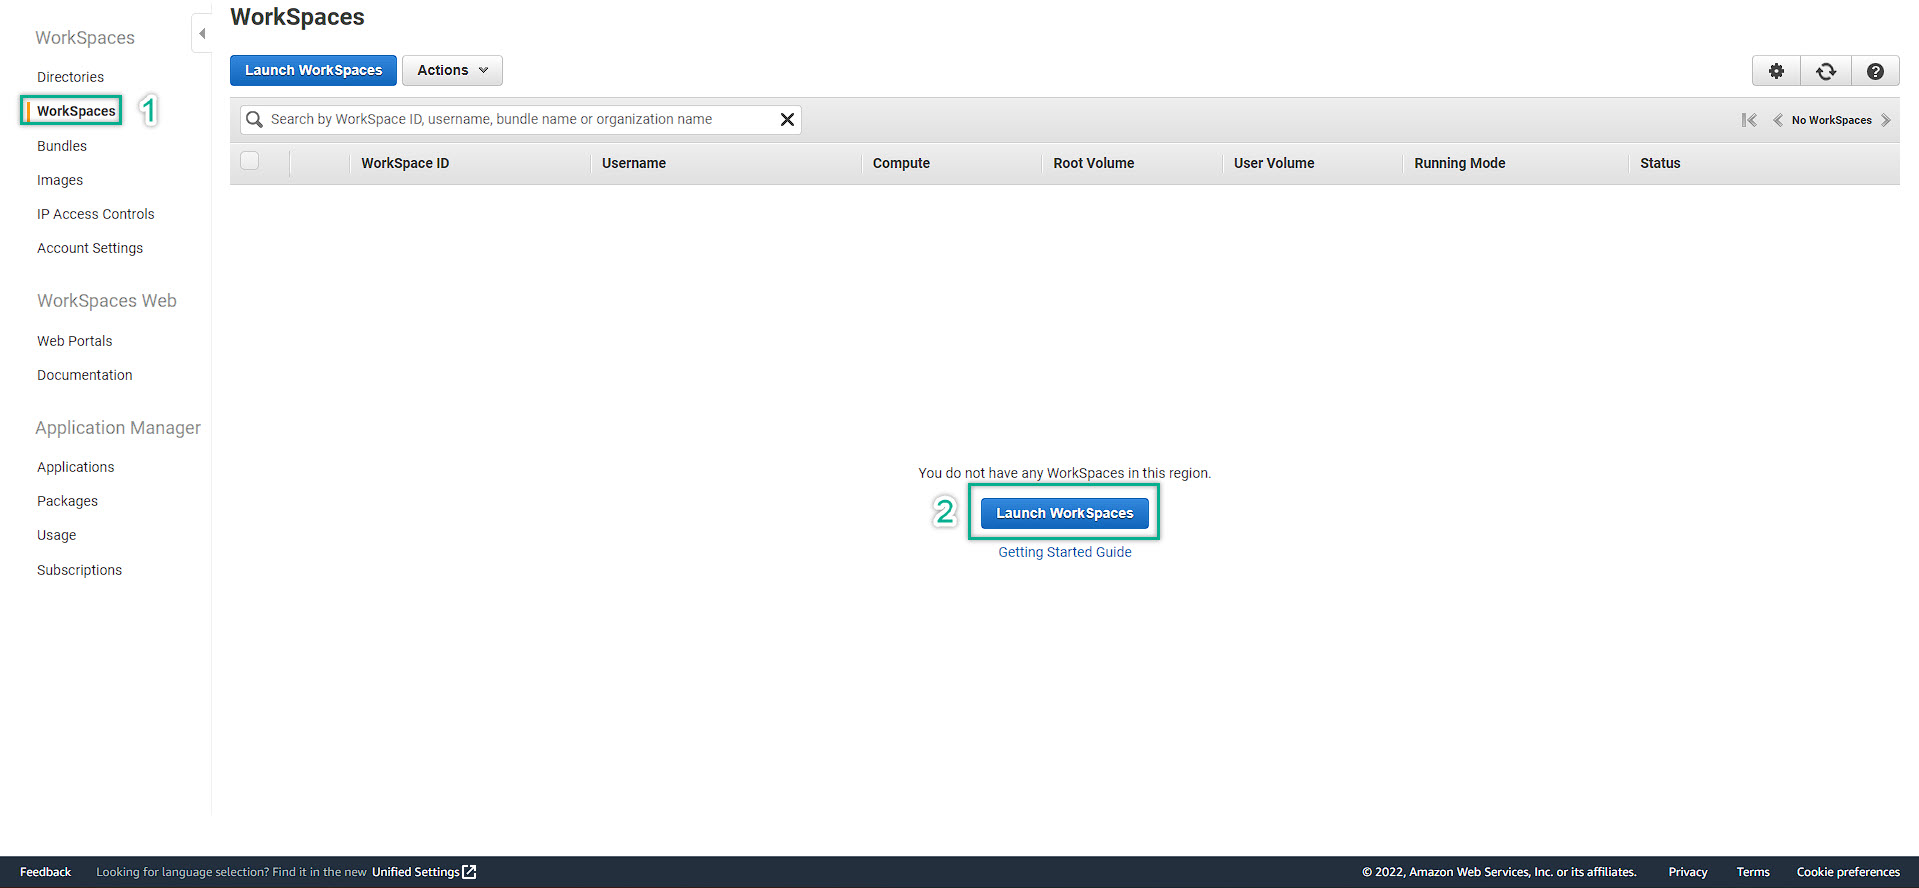
Do follow the step-by-step from Amazon WorkSpaces Management Console
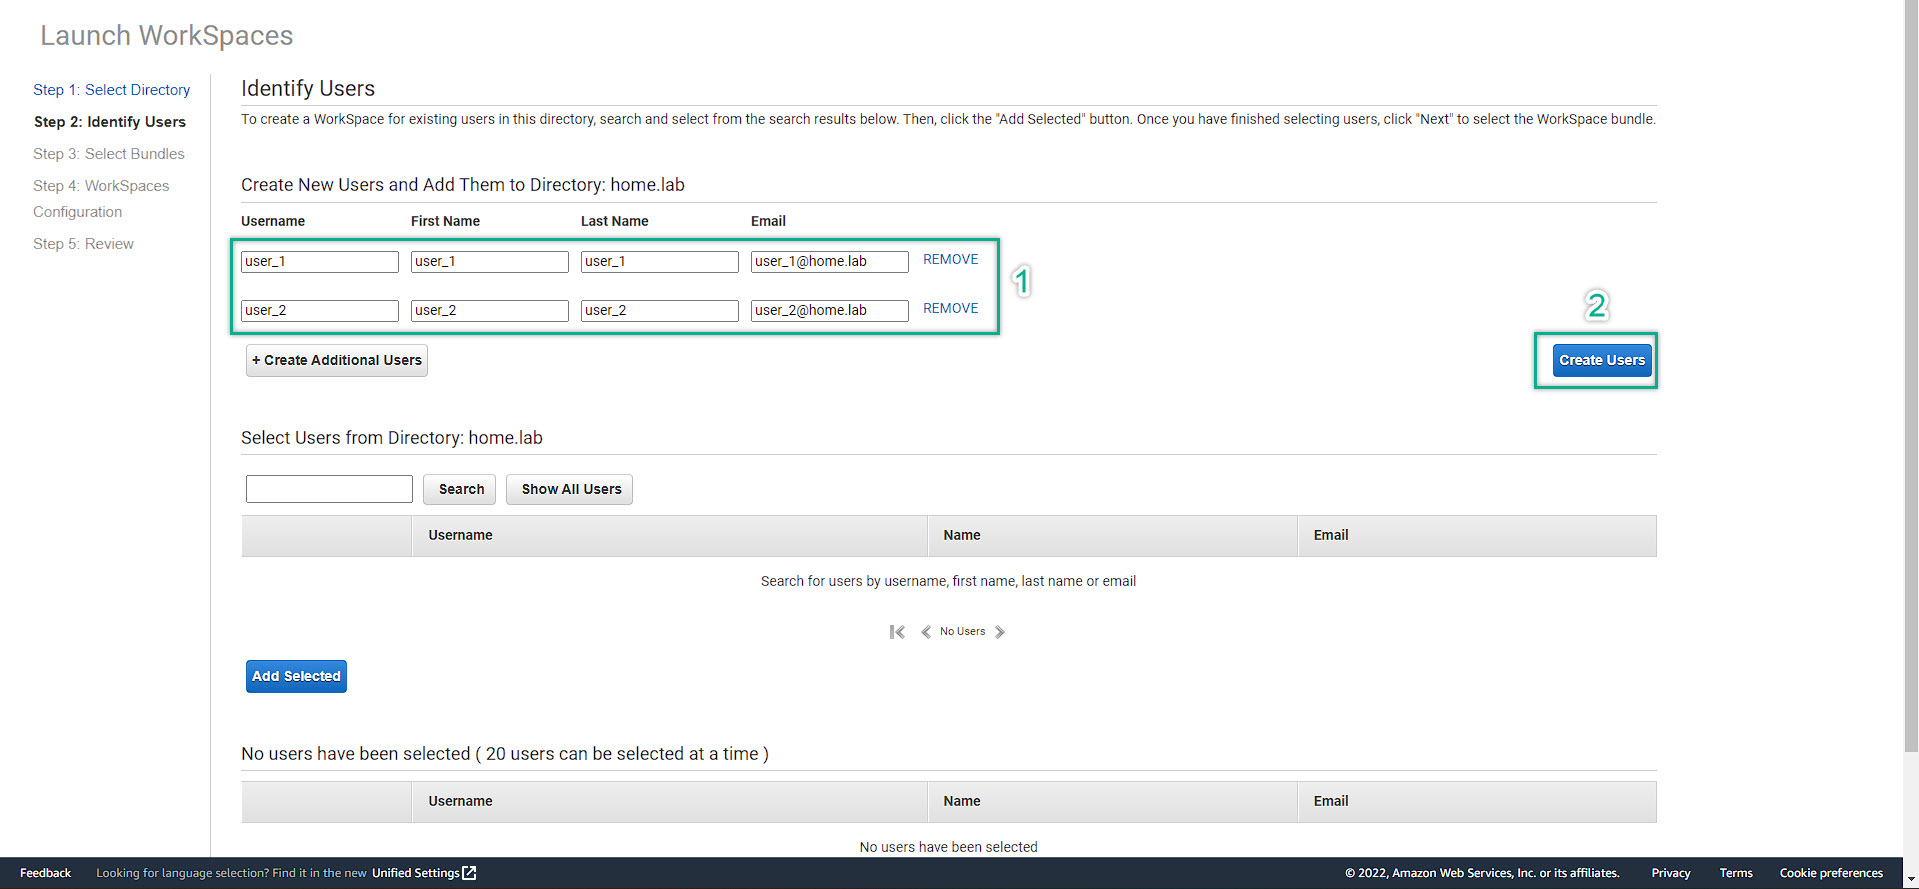
Create users directly from WorkSpaces Management Console
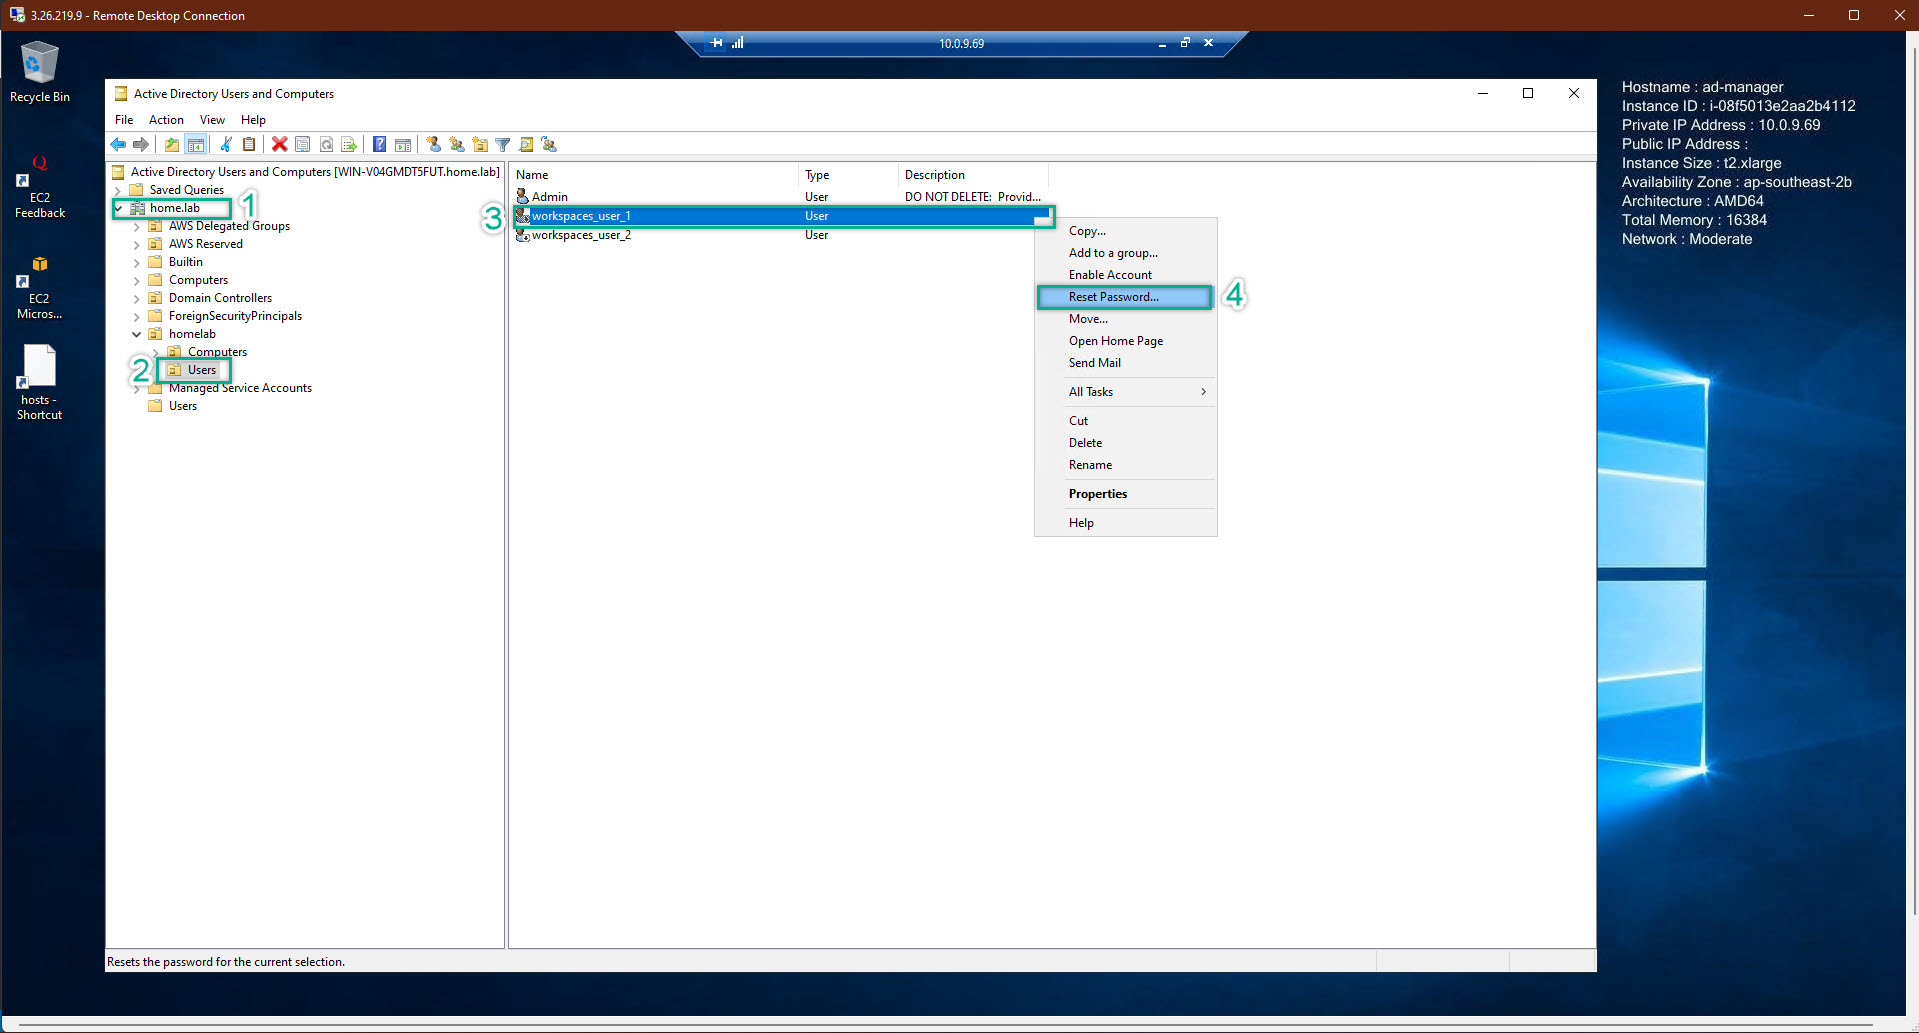
After created user from WorkSpaces Management Console, we come to the AD-Manager EC2 to active the user account, do for all of the accounts:
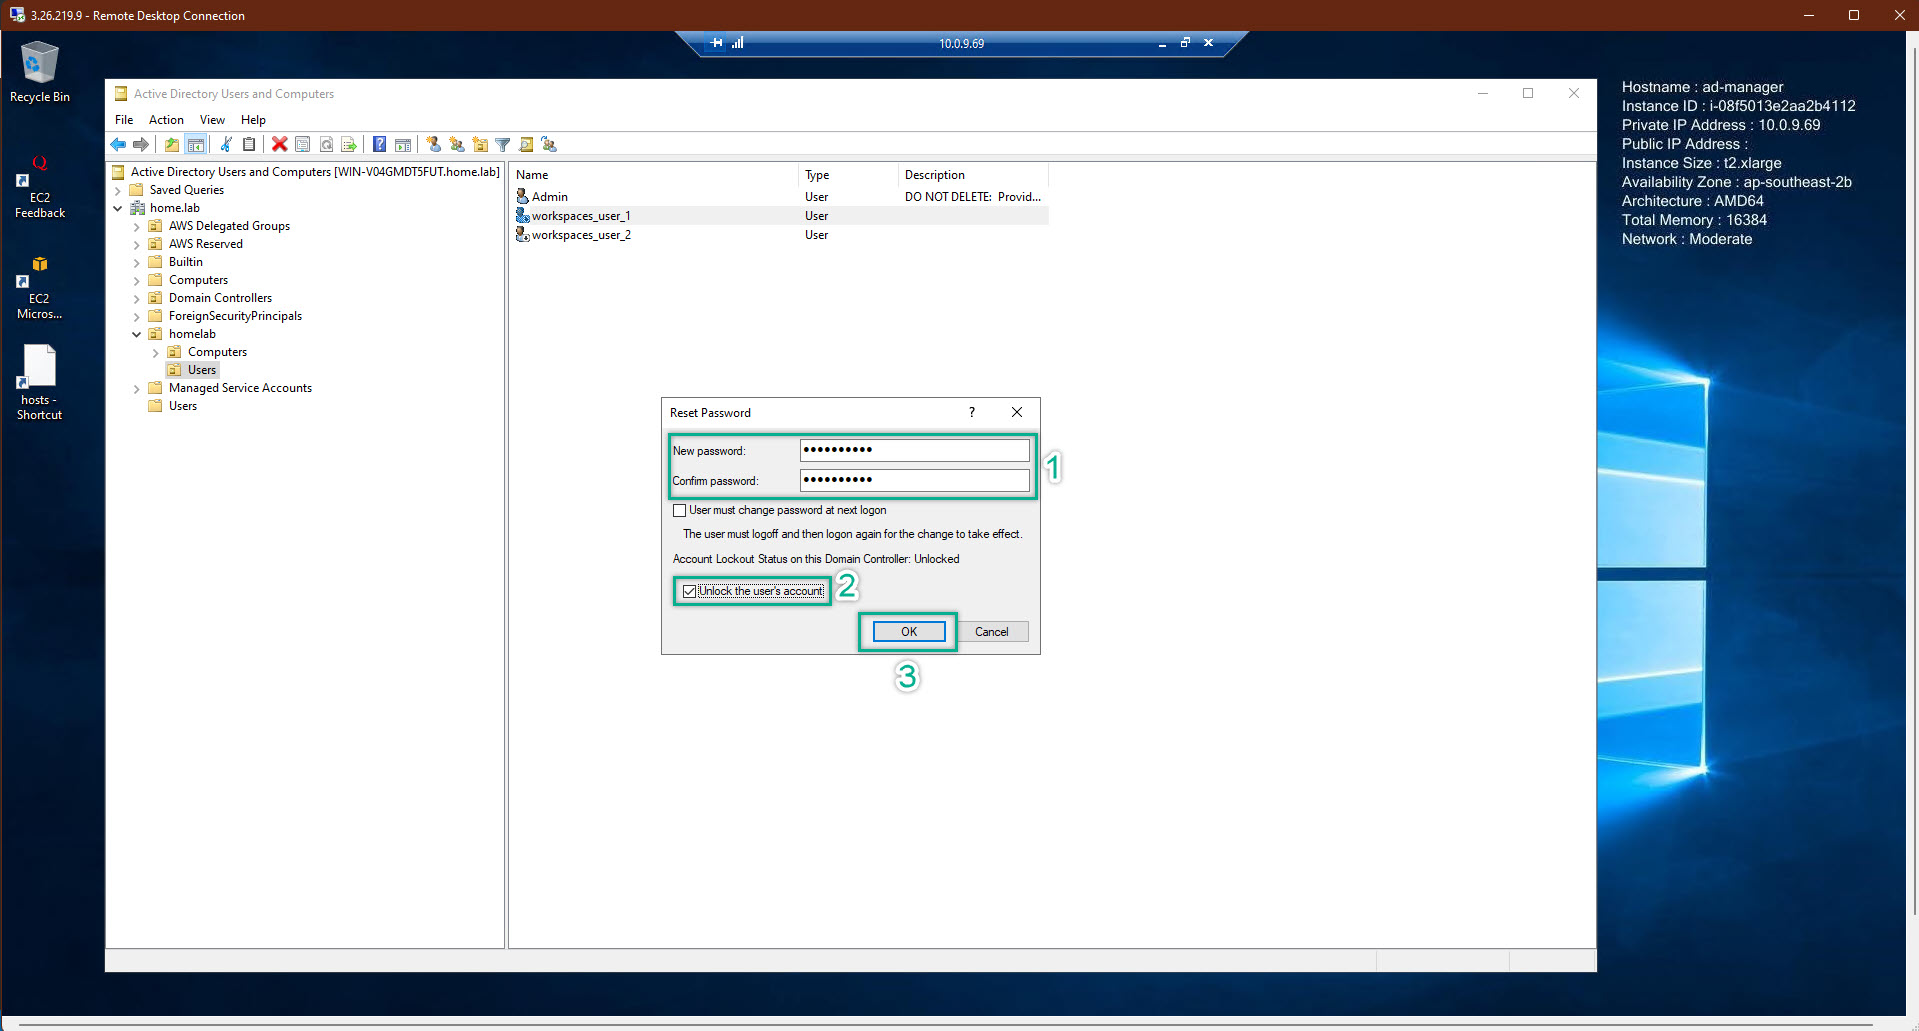
Reset the user password: right click to the choosen user => Reset Password
Enable the user account
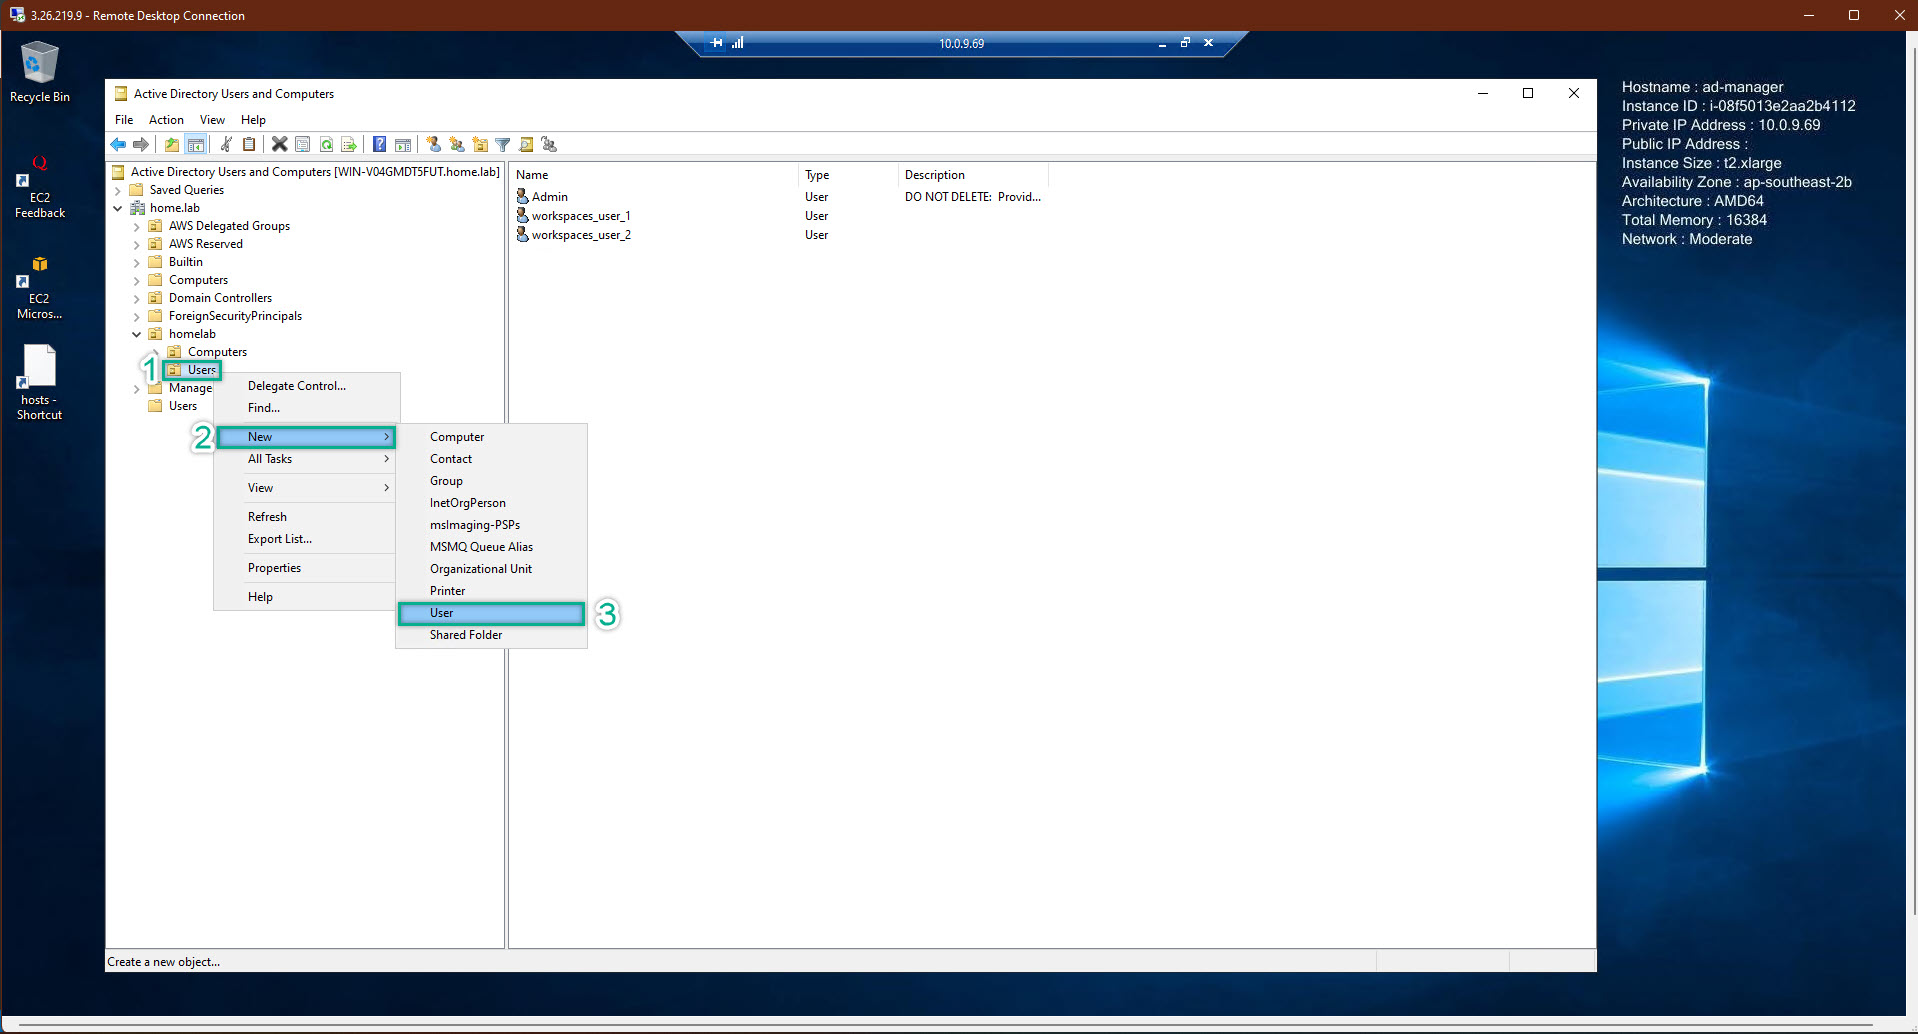
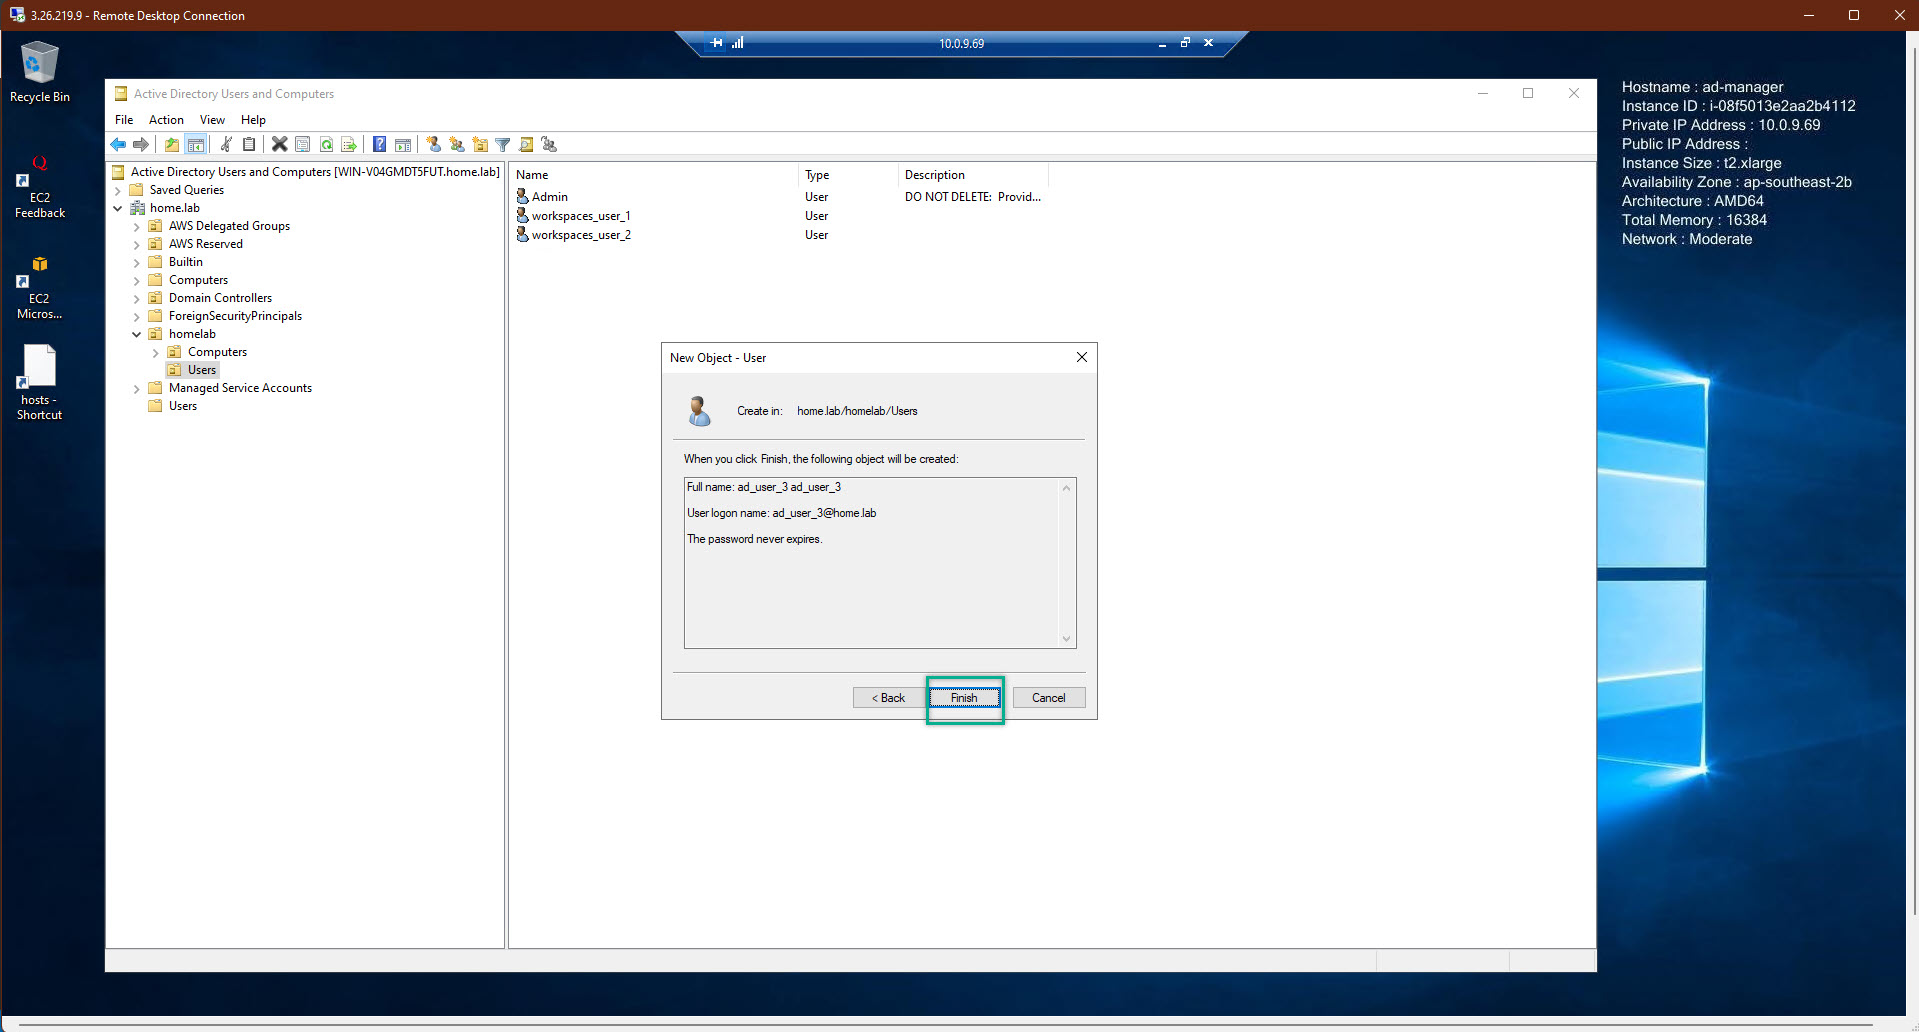
Create user account from Active Directory Users and Computers
Right click to the users => new => user
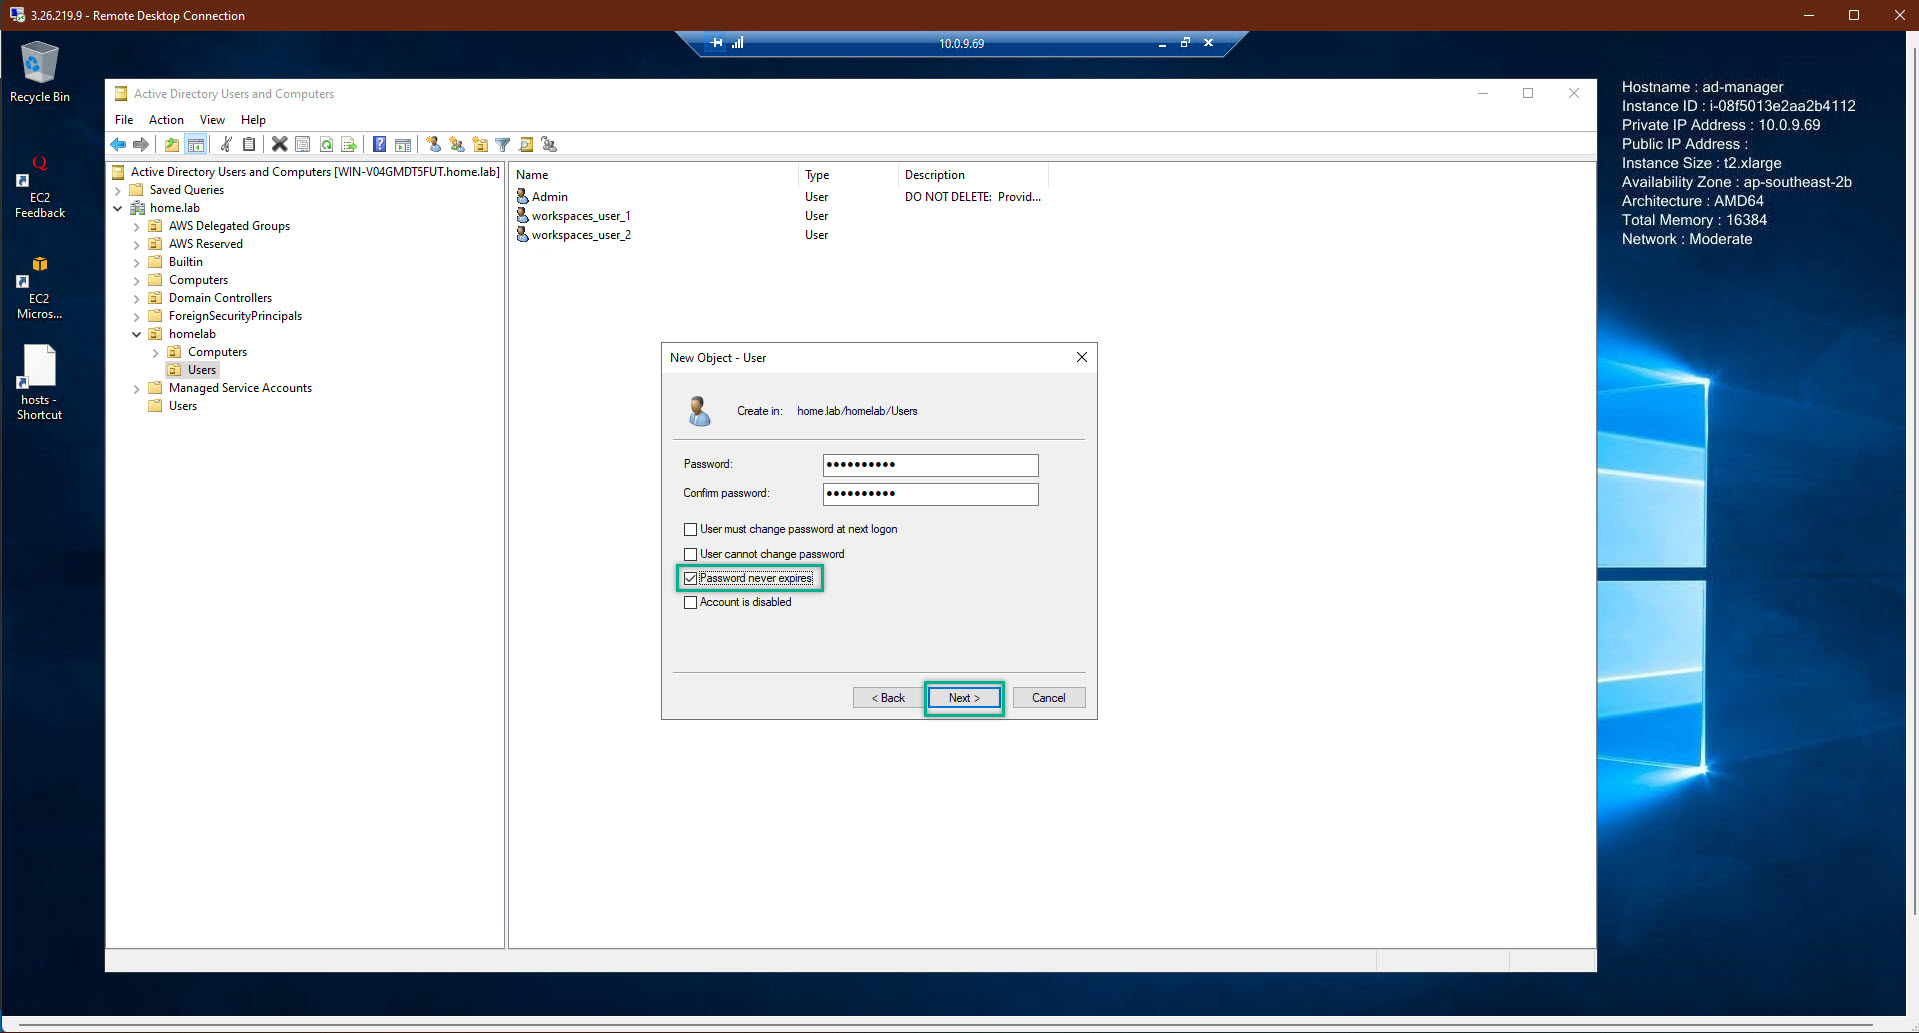
Full fill all required information, included password
Un-checked the User must change password at next log-on
Check password never expires
Finished
Things to remember:
user account which created from WorkSpaces Management Console need to do Password Reset, then Enable the user account
user account which created from the Active Directory Users and Computers DO NOT NEED to do Password Reset and Enable account
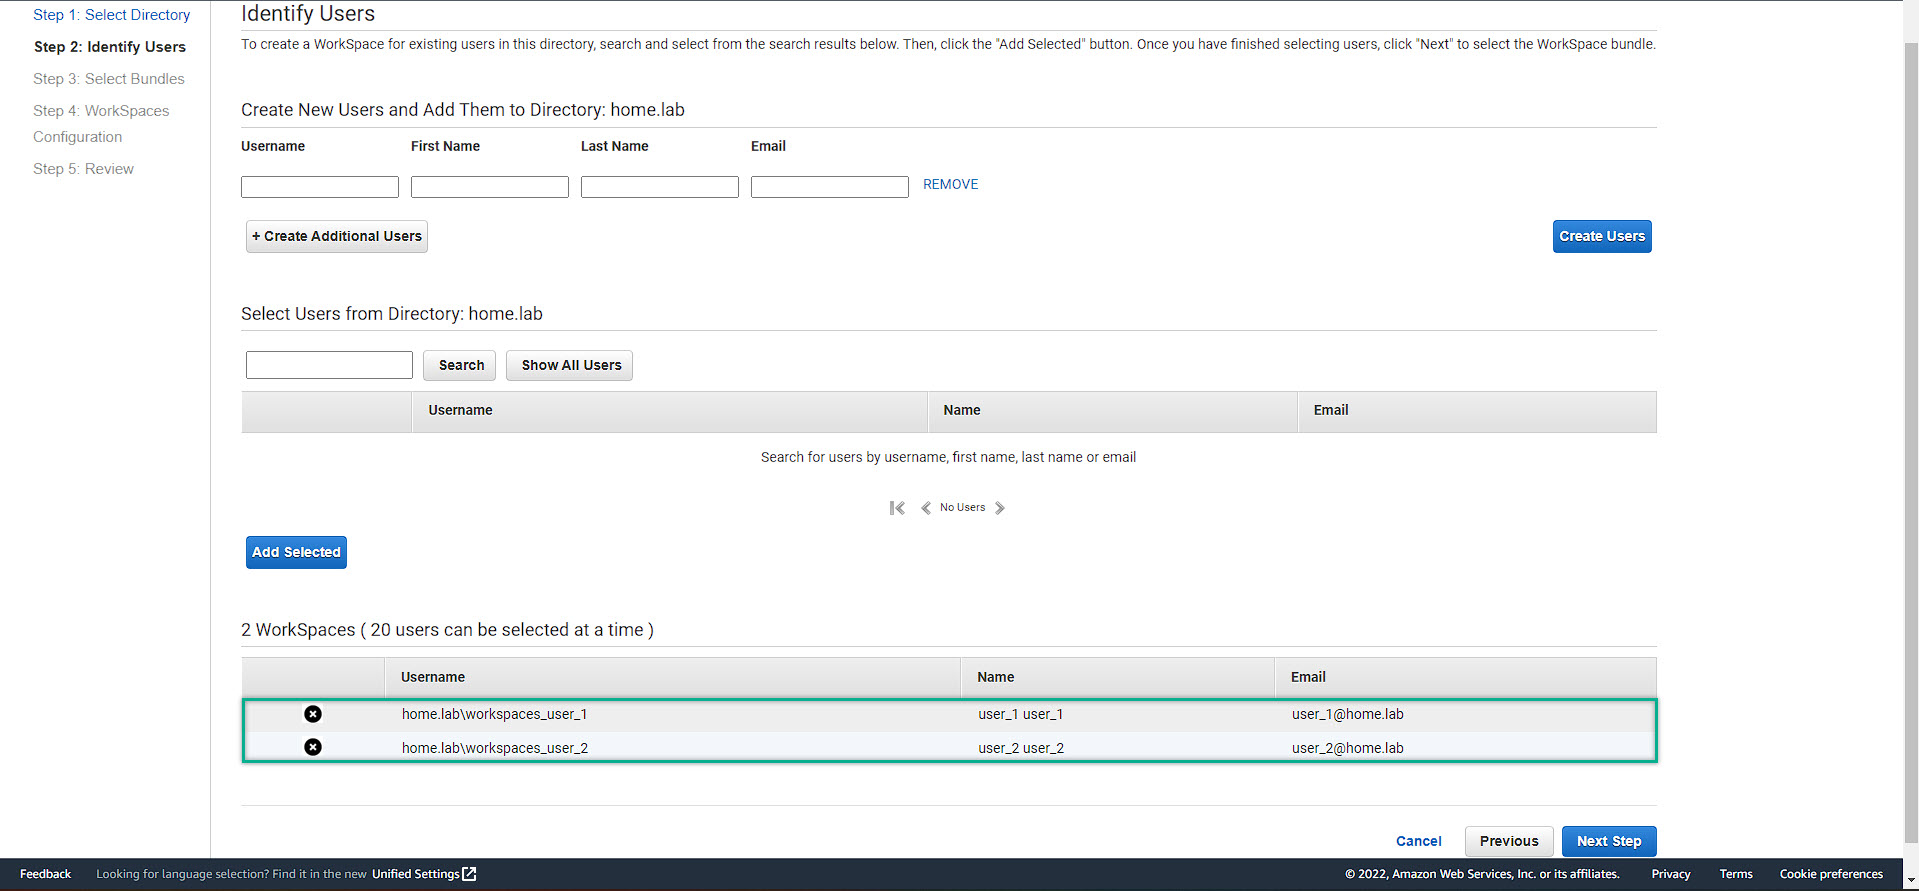
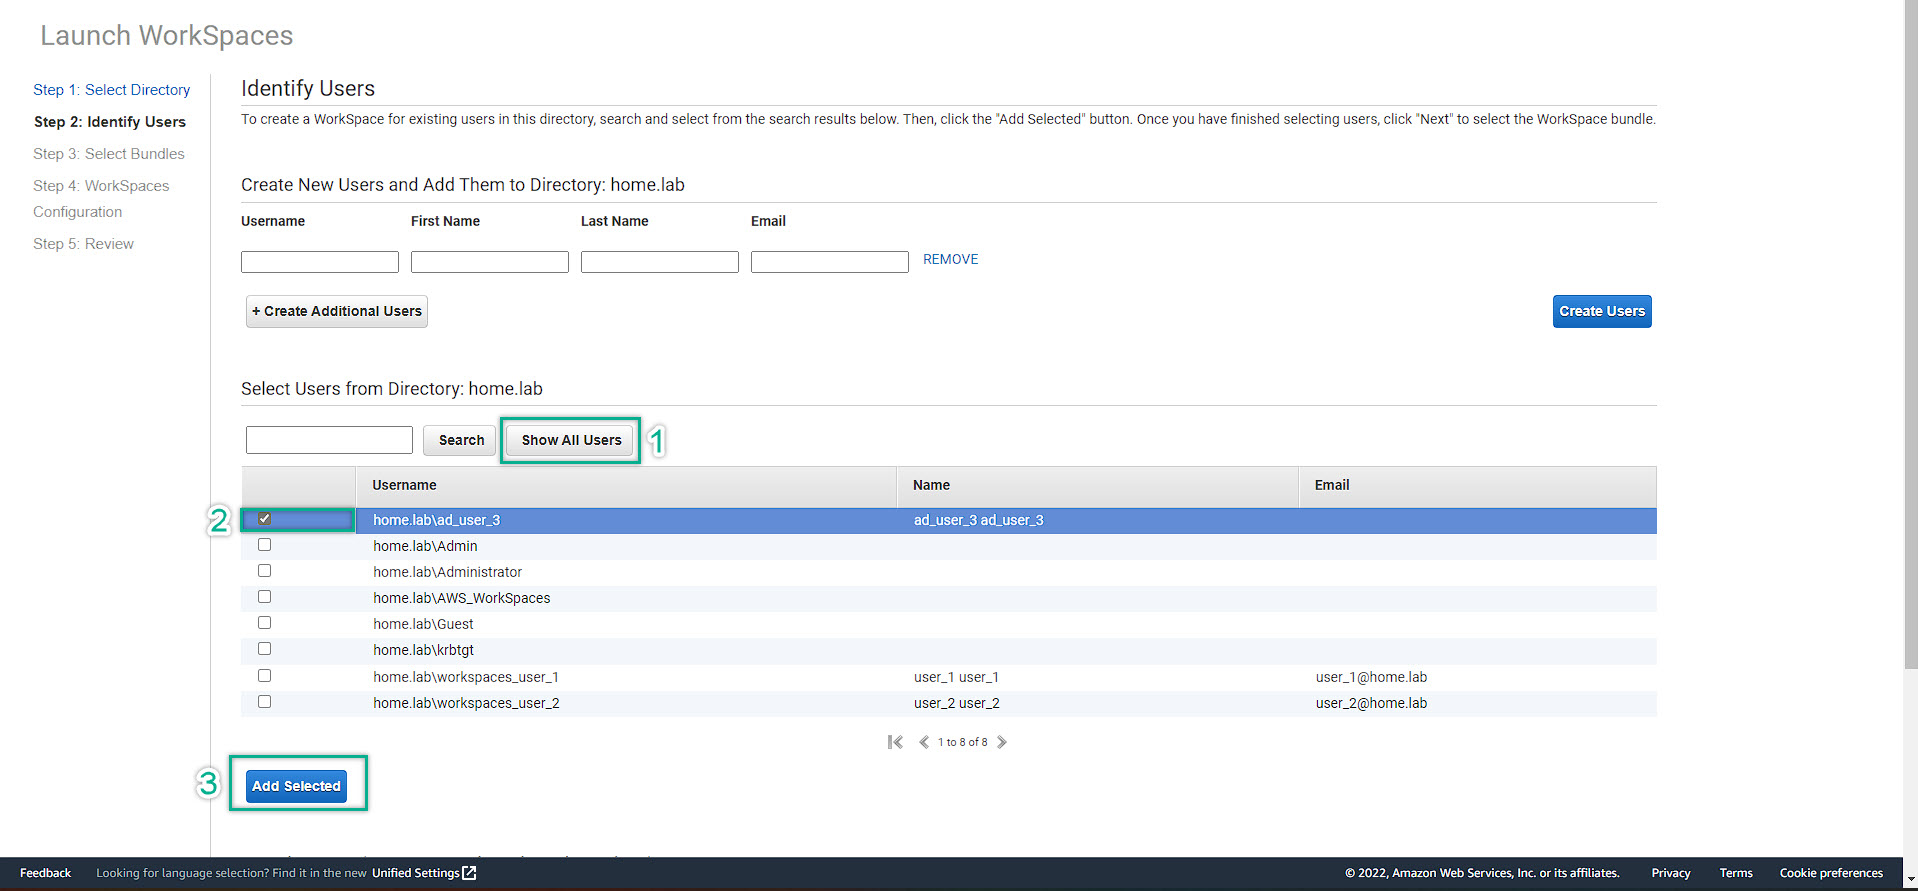
For those users which are created from the AD-Manager, you need to add email for the users so that can add them to the WorkSpaces environtment. If not, WorkSpaces will prompt error “User need to have an email address ….”
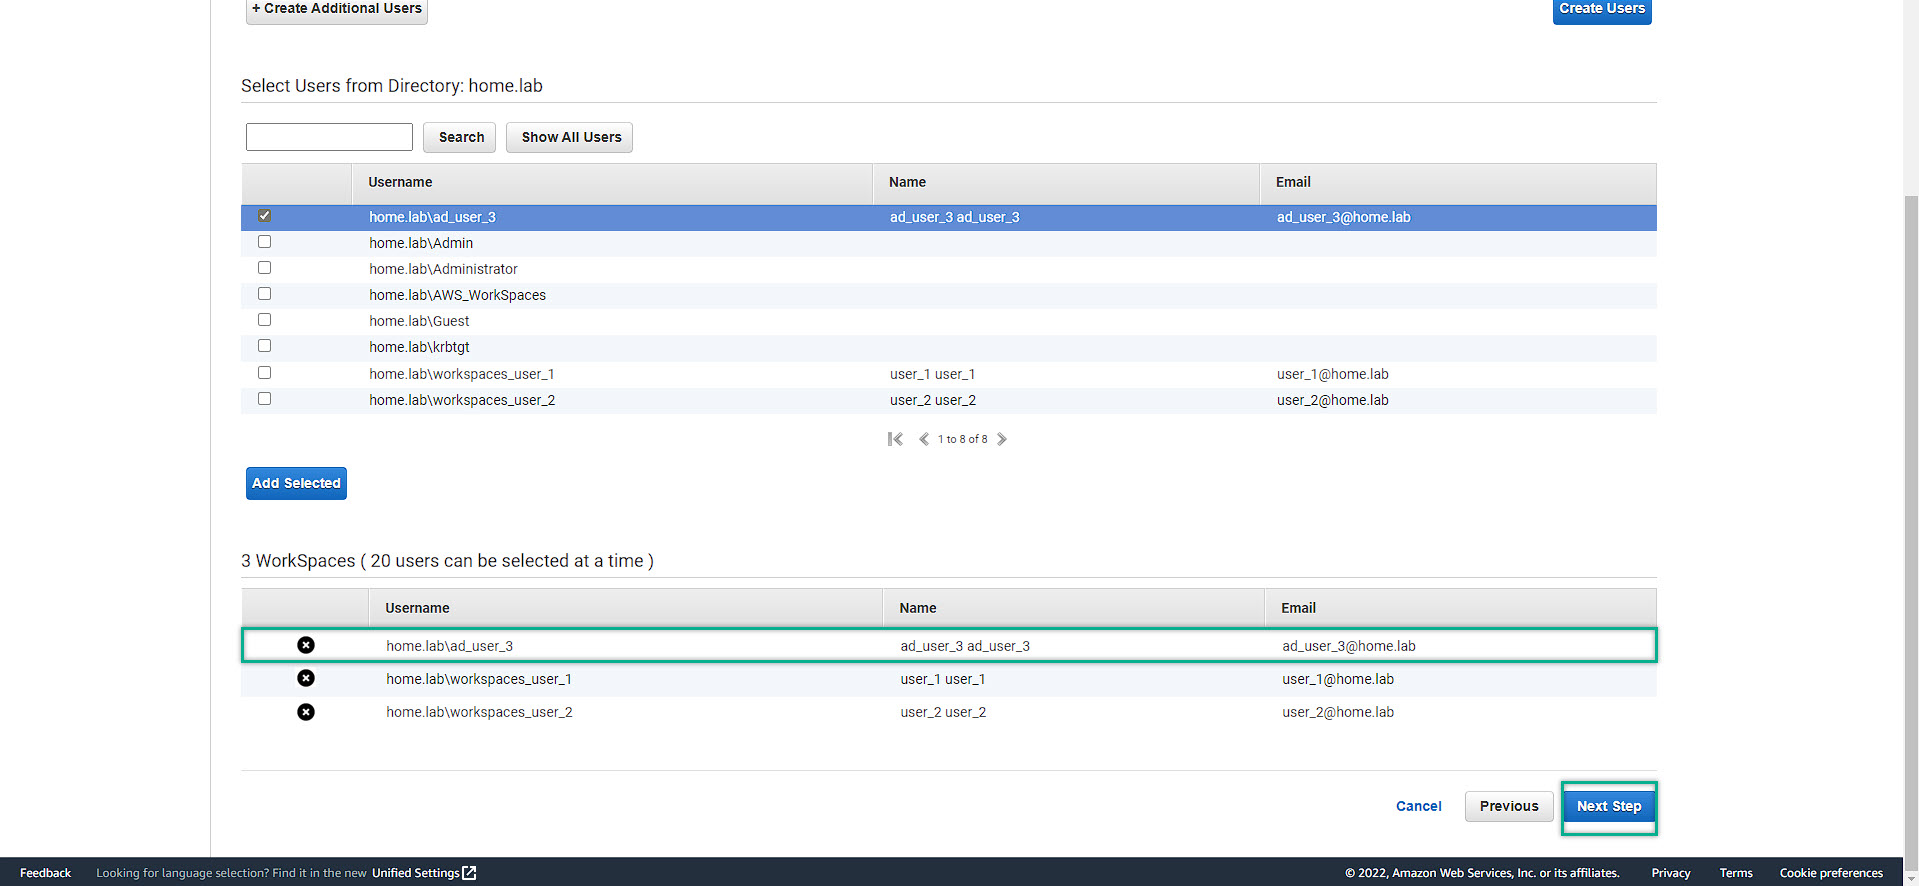
Show all of users we had and add them to the WorkSpaces environment, then click Next
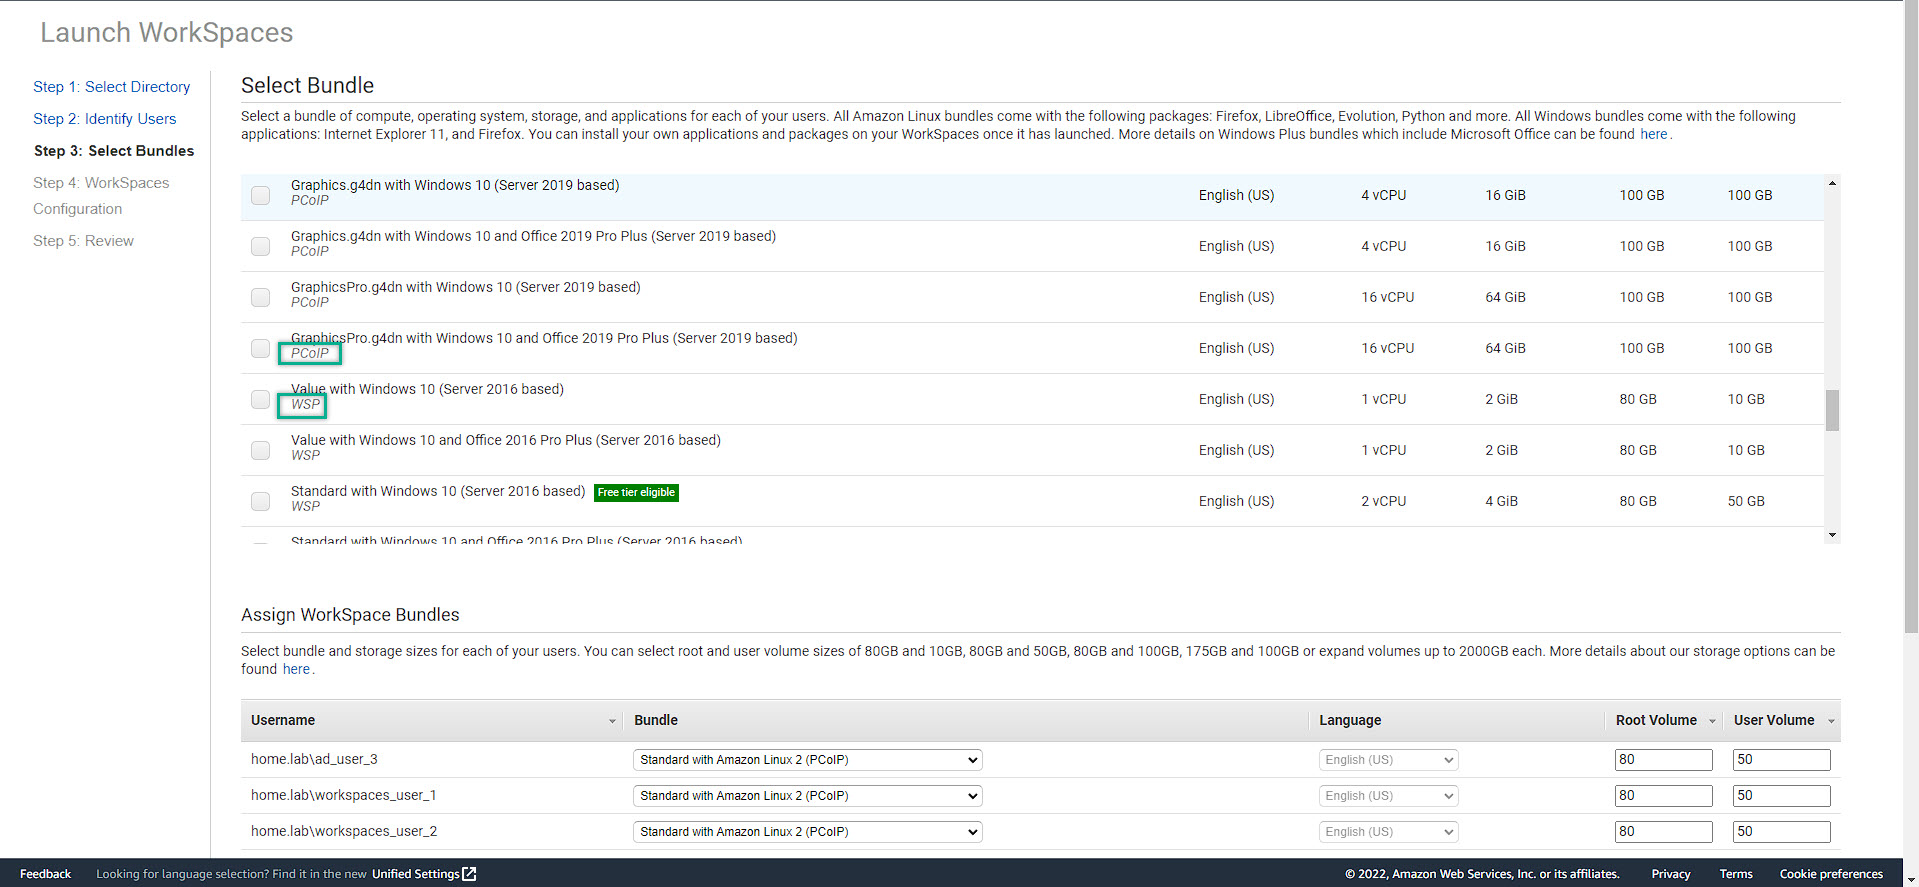
To pay attention that Amazon WorkSpaces are currently provides 2 differences protocols:
PCoIP: if you want to use Amazon WorkSpaces on tablets (iPad / Android)
WSP - WorkSpace Streaming Protocol: for higher loss/latancy tolerance
For more information about Amazon WorkSpaces protocol, please refer to this link: Amazon WorkSpaces Protocol
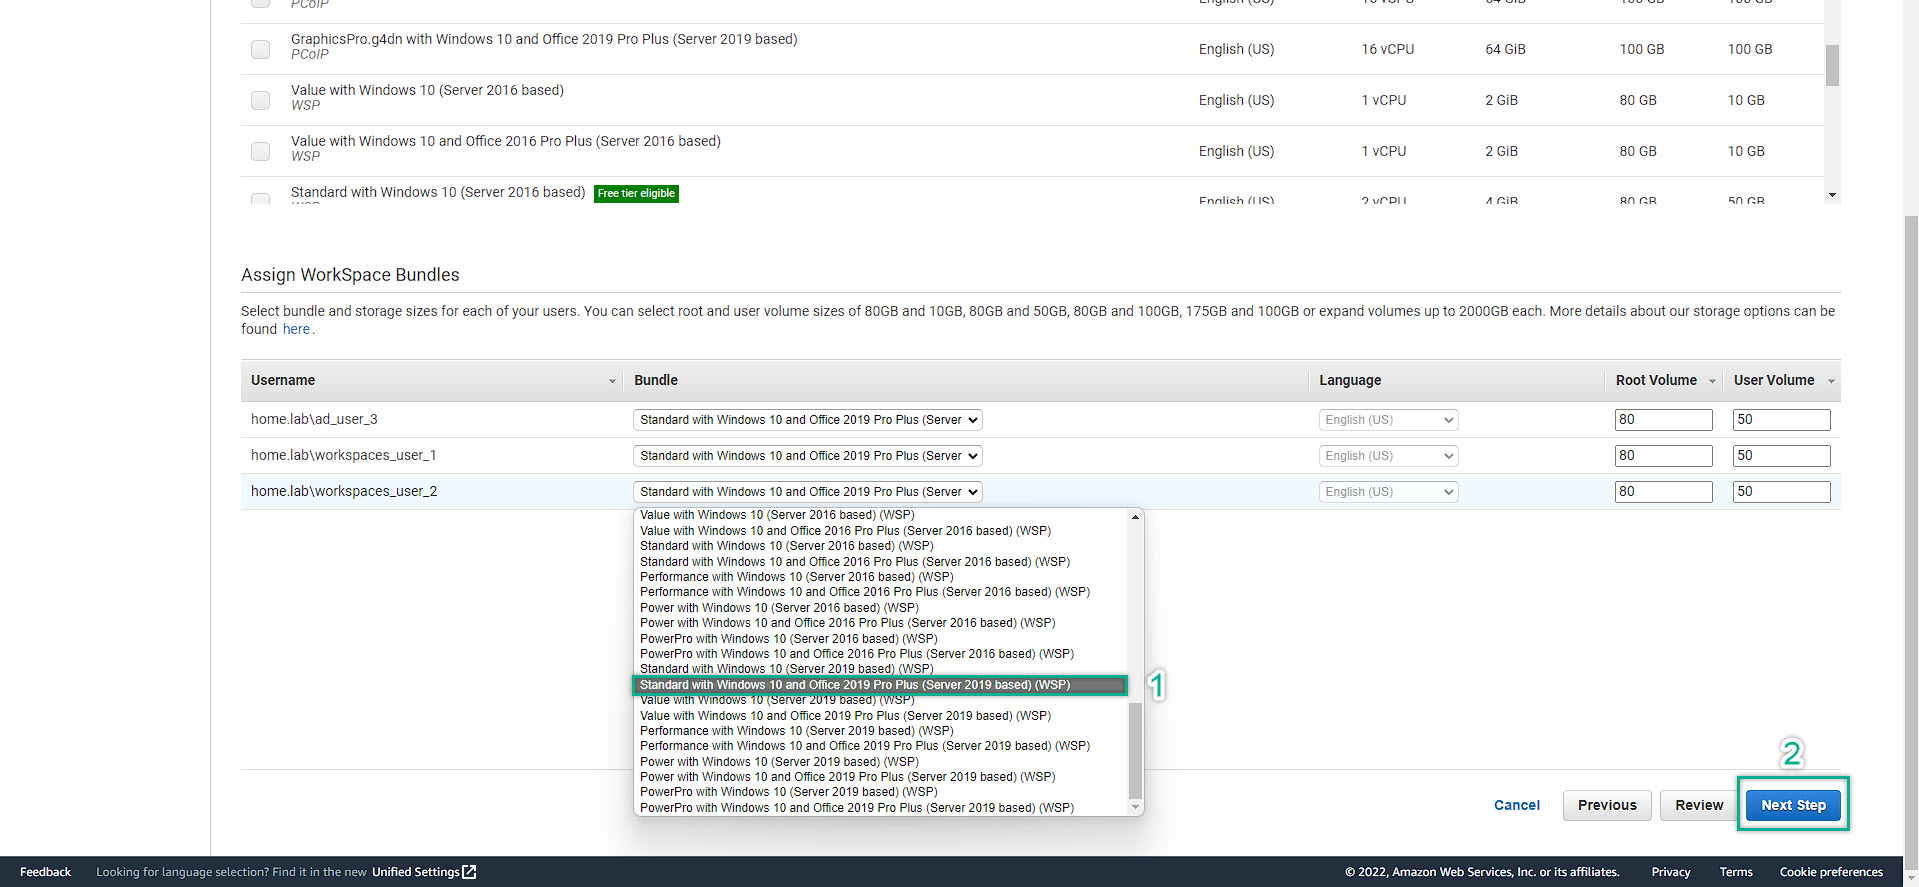
There are so many choices, but let choose the Standard Windows 10 with Office to experience the most basic needs for an office employee: Windows and Office Suite
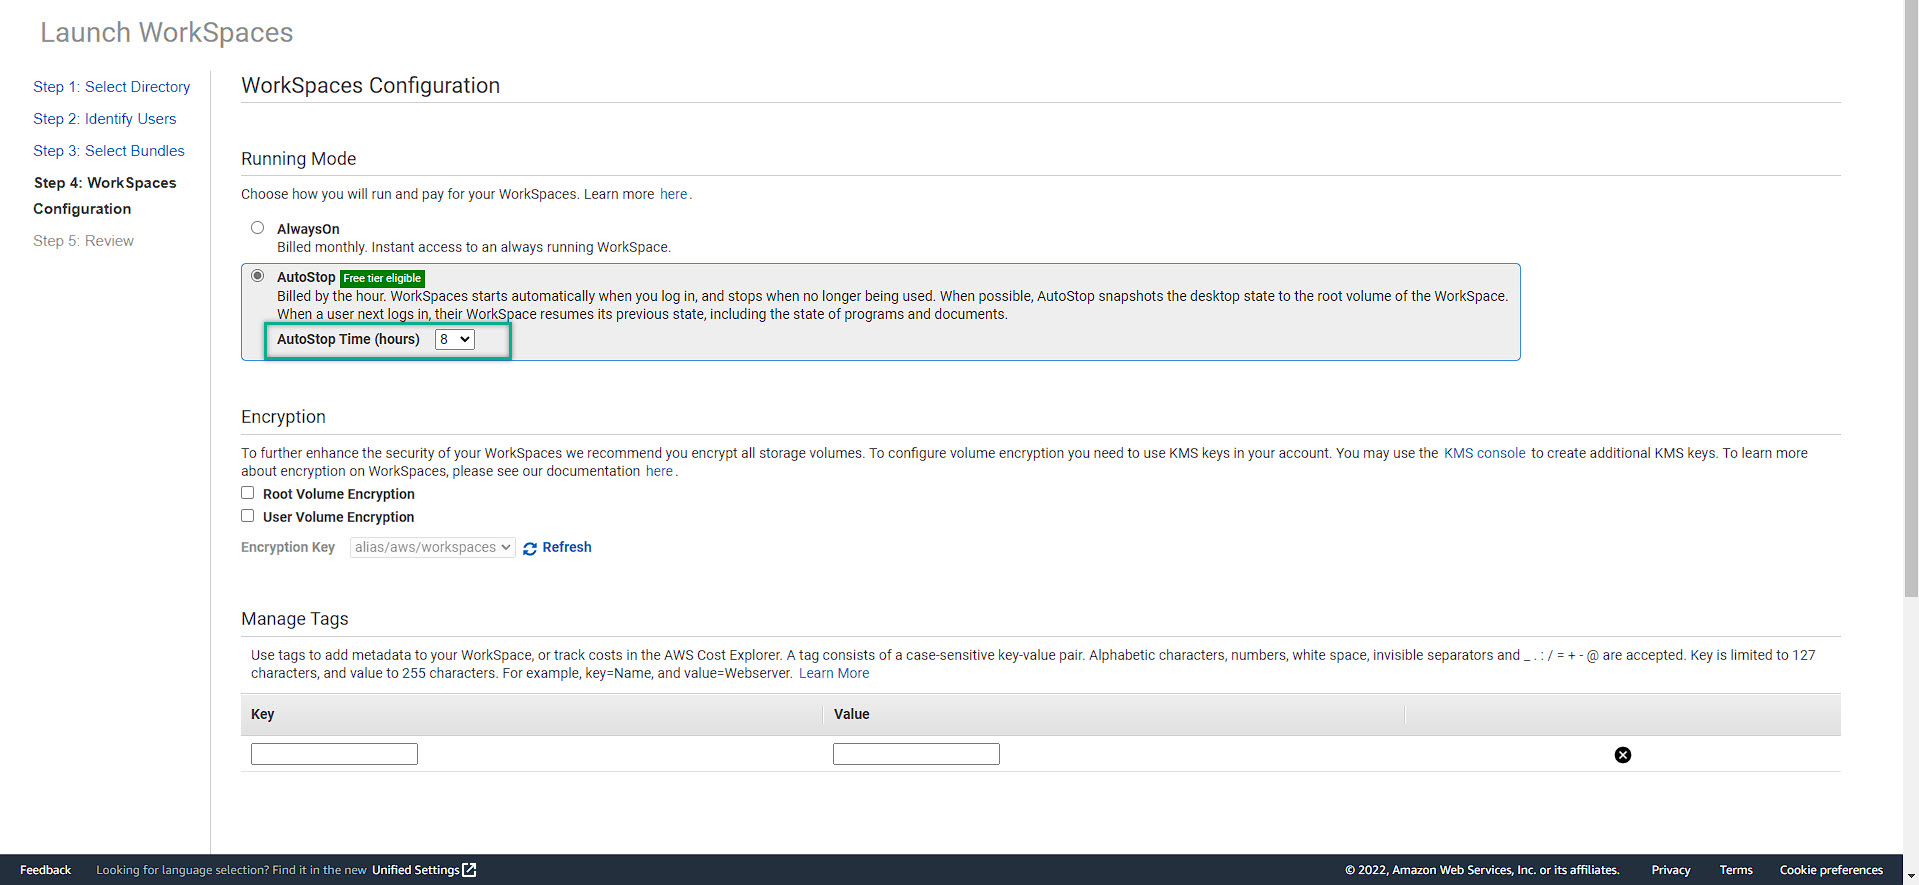
We can also deploy Auto Stop the WorkSpaces to save the cost. Let’s say, a normal office employee working 8hrs/day. Then, we will set the time for it.
After done setting up the time => Scroll DOWN => NEXT
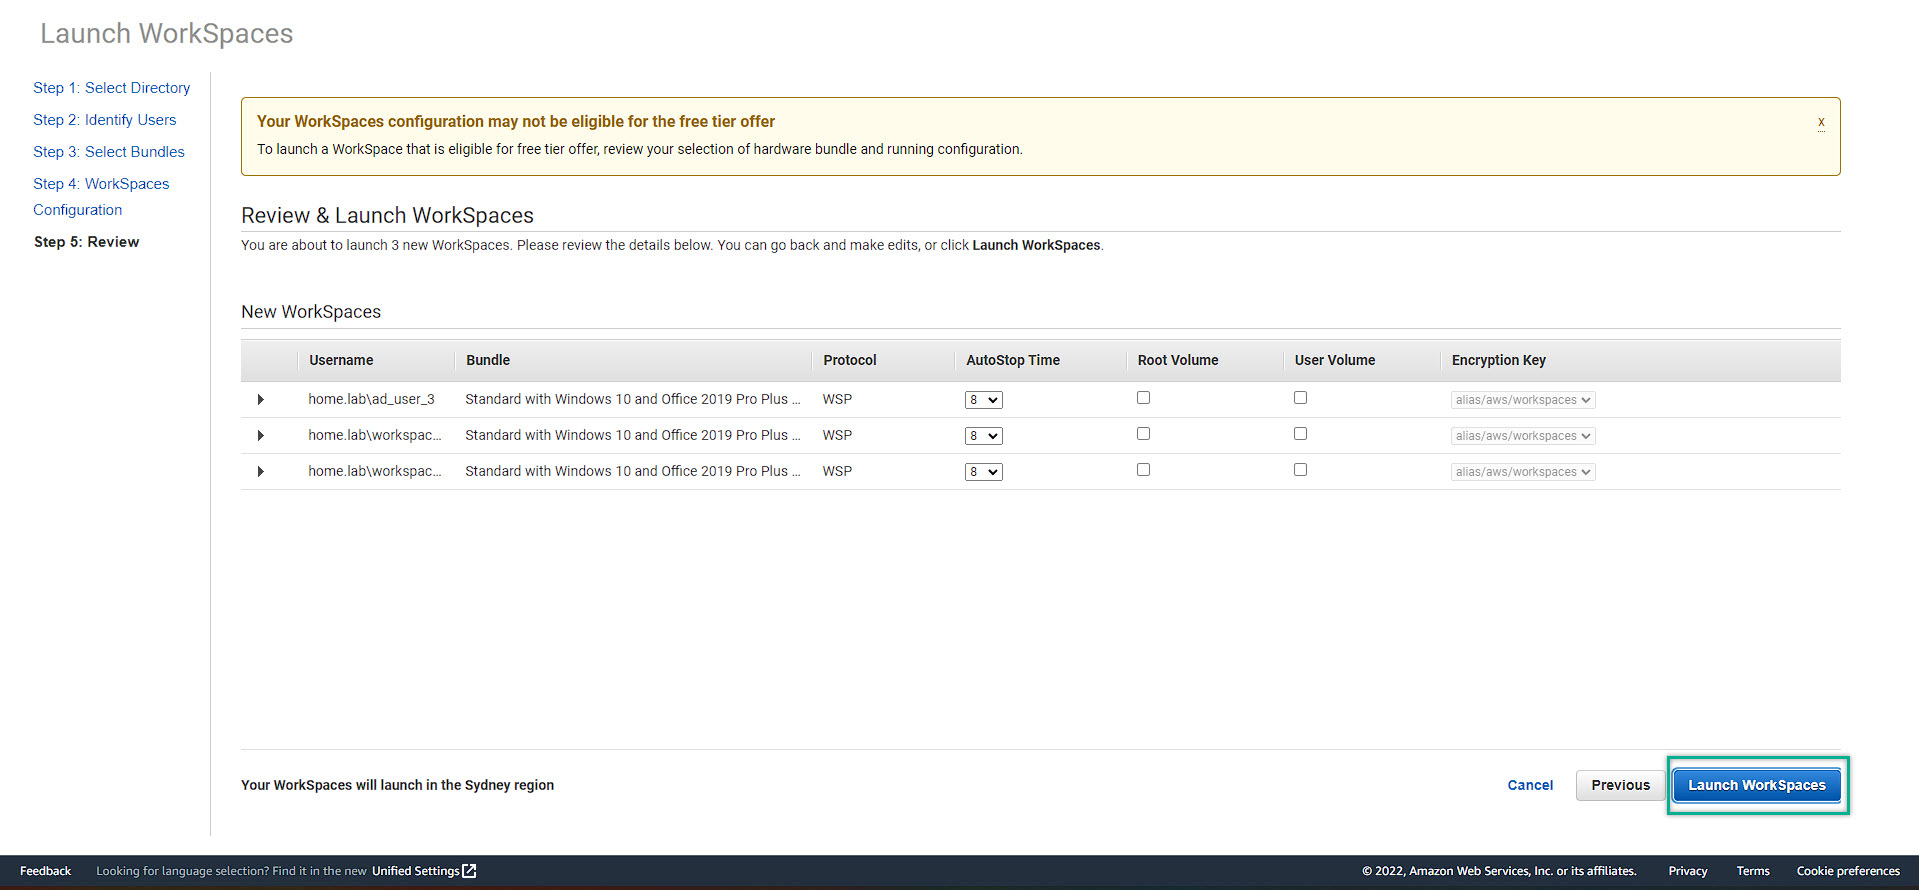
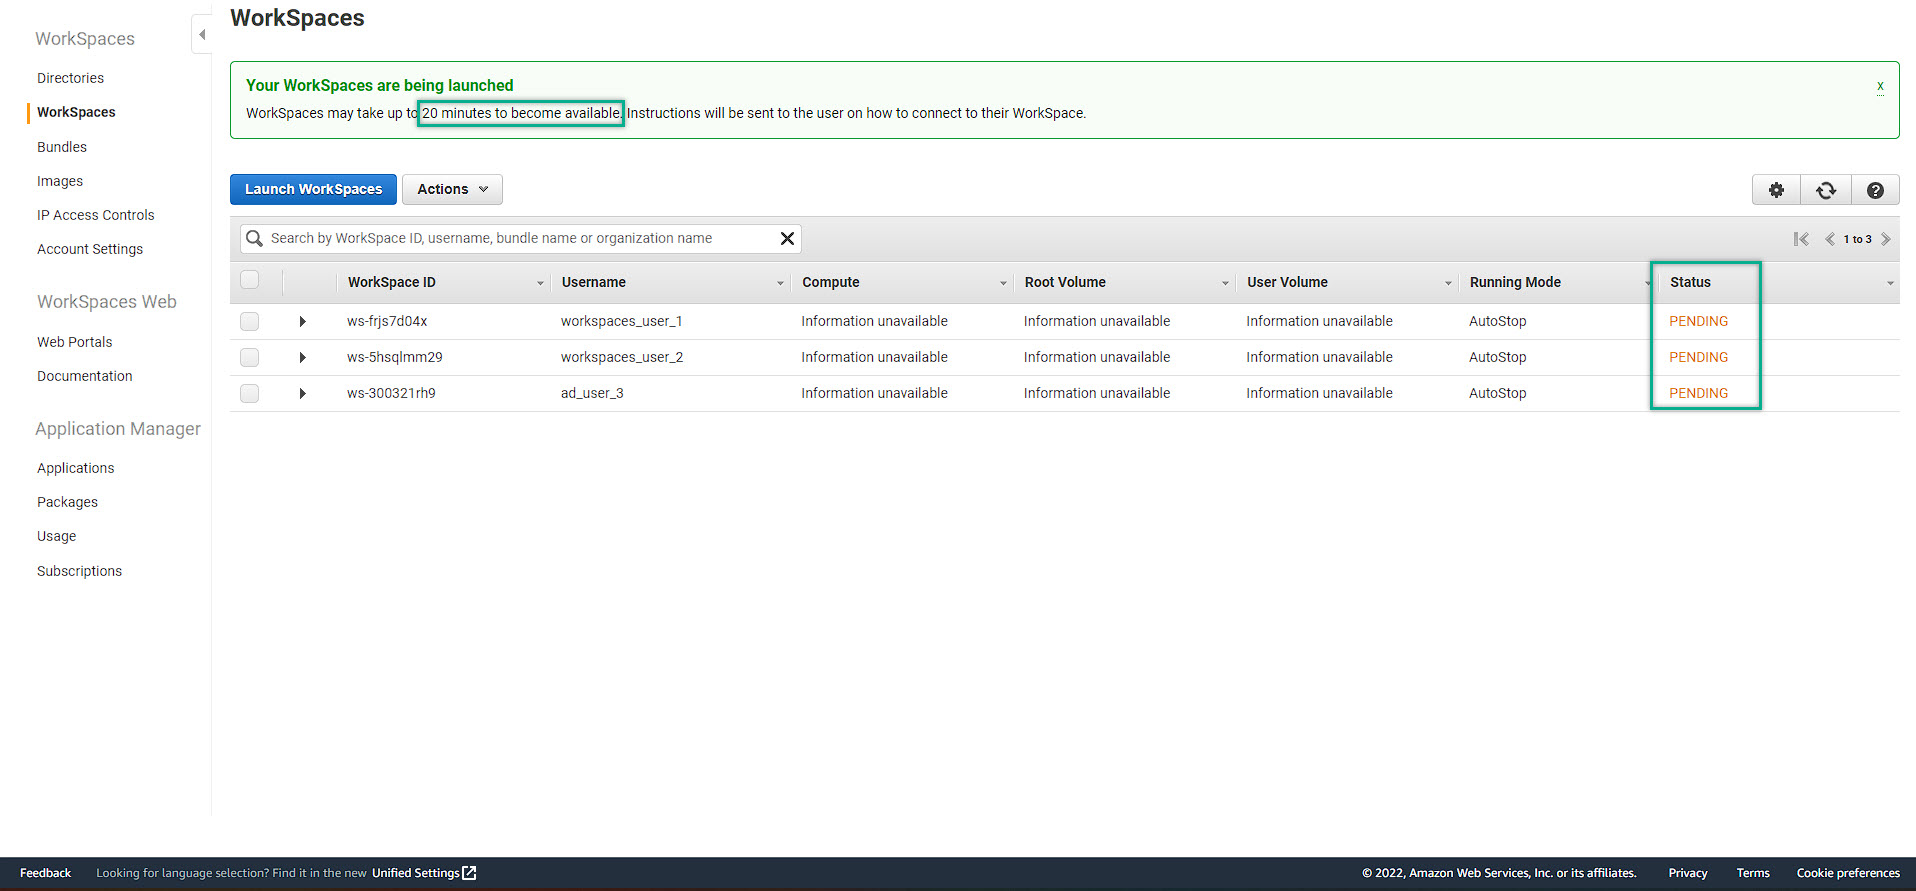
After review our setup, click Launch WorkSpaces. It takes 20 minutes for workspaces to be availabled